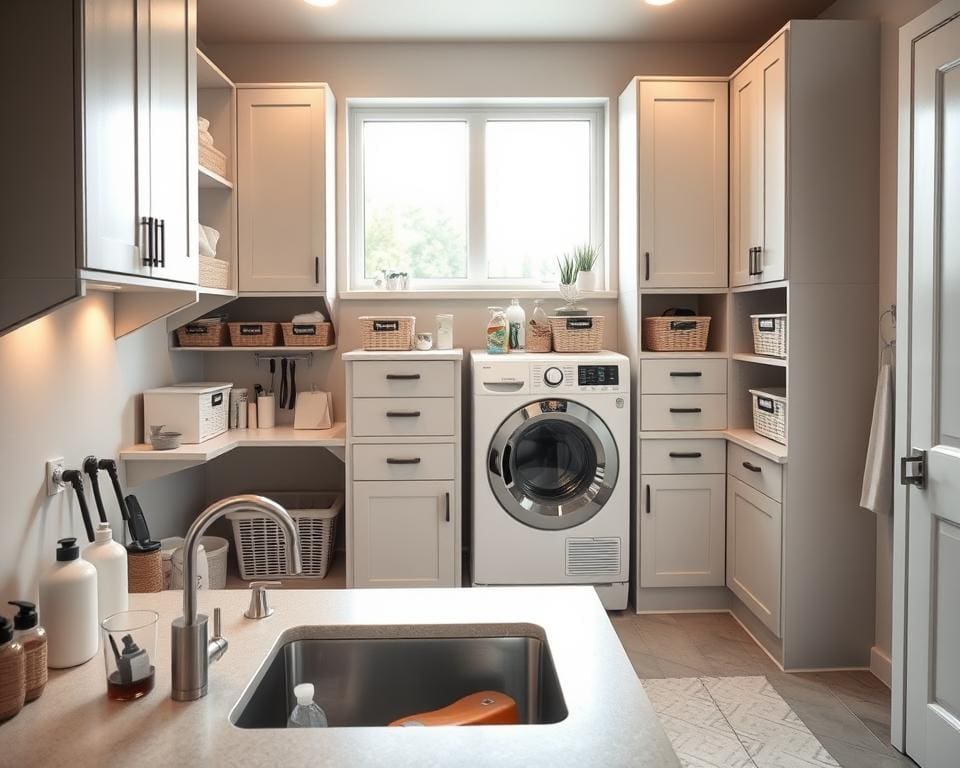

Designing a practical utility room begins with a clear purpose: a service-focused space for laundry, storage, pet care and everyday chores. You want a room that speeds tasks, protects the rest of the house from clutter and damp, and remains pleasant to use. Keeping utility room design centred on daily efficiency and long-term durability will give you a functional utility room that adds real value to your home.
This guide is for homeowners and renters across the United Kingdom who must make the most of small or awkward spaces, retrofit older terraces or plan new builds. You will often face limits such as modest square footage and fixed plumbing locations, so practical solutions and clever utility room ideas are vital.
Your primary objectives are straightforward: create a clear workflow for sorting, washing, drying, ironing and folding; provide ample organised storage; choose easy‑to‑clean finishes; select the right appliances; and ensure safe plumbing and electrics with good ventilation. Meeting these goals reduces chore time and improves laundry care.
Start with an honest assessment of the space and prioritise function over decoration, while allowing attractive finishes and lighting to make the room welcoming. For inspiration on multi‑use layouts and design approaches that support everyday living, see this overview on creating a home that supports your lifestyle: utility room ideas and planning.
Finally, remember safety and compliance: appliance installations should follow manufacturer instructions and Building Regulations where relevant. Use registered professionals—Gas Safe engineers for gas work and NICEIC or Part P‑compliant electricians for specialist installations—so your utility room design meets standards and performs reliably.
Assessing your space and priorities for a practical utility room
Before you start ordering cupboards or moving plumbing, take time to measure and list what the room must do for you. A clear appraisal helps you design a utility room layout that fits daily life and the house you live in.
Begin by measuring length, width and ceiling height. Mark door and window positions and note where water, waste pipe, electrical sockets and gas lines sit. Check if appliance access is restricted by narrow hallways or steep steps. These simple checks let you assess utility room space accurately.
Look for structural limits such as load-bearing walls, window-sill heights and existing vent routes. Think about converting awkward spaces: an under-stairs cupboard, part of a garage or a cloakroom can work. Each option has trade-offs in ventilation, plumbing access and insulation that affect cost and practicality.
Plan the workflow so chores run smoothly. Create zones for washing, drying, folding, ironing and storage. Use a basic work triangle—appliance, sink and folding surface—to cut unnecessary steps. Good laundry room planning reduces time spent shuffling baskets and improves safety.
List the tasks you expect to perform often: machine washing, delicate hand-wash, ironing, drying coats, pet care, boot storage and recycling sorting. Match storage and surfaces to those tasks so everything has a place and is easy to reach.
Factor in household specifics. Family size, weekly wash volume, pets and sporting kit influence layout and storage needs. If anyone has mobility needs, lower counters and easy-reach shelving make daily use simpler and safer.
Check ergonomics and safety. A counter height around 90cm suits many people but adjust to your height. Allow clearances for appliance doors and space for laundry baskets. Add anti-slip flooring and position sockets for washer, dryer and iron with fused spurs where needed.
Set a realistic budget and timeline before work begins. Break costs into design, cabinetry, appliances, plumbing, electrics, ventilation, flooring, labour and a 10–20% contingency. For small refits allow 1–2 weeks, medium projects 2–4 weeks and major structural changes 4–8+ weeks, including lead times for appliances and bespoke units.
Decide if building control notification or planning permission applies to your plans. Get at least three quotes from reputable tradespeople such as a Gas Safe-registered engineer, a NIC EIC-approved electrician and a qualified joiner to compare prices and timelines.
Essential storage solutions to maximise efficiency
Good storage transforms a cramped utility into a calm, efficient space. Start by planning zones for laundry, cleaning and ironing so you know where built-in cupboards, open shelving and dedicated drawers will do the most work. Thoughtful placement saves time and keeps surfaces clear.
Built-in cupboards and shelving options
Built-in cupboards utility room designs conceal clutter and use awkward alcoves or under-stairs space. You can fit tall larder-style cupboards for mops and brooms, base units with sink and worktop, and overhead wall units for items you rarely touch.
Choose moisture-resistant MDF or plywood with water-resistant edging for longevity. Laminate or vinyl-faced panels work well where spills are likely. Pick corrosion-resistant hardware such as stainless steel hinges and runners to avoid rust.
Practical features make built-ins more useful. Soft-close doors, adjustable shelving, pull-out racks and toe-kick drawers for shoes add convenience. Consider integrated laundry baskets or pull-out hampers to keep dirty clothes out of sight.
Accessible storage: open shelving, hooks and baskets
Open shelving utility room options give quick access to the items you use most and act as a visual inventory. Fit shelves above counters so work surfaces remain uncluttered. Use labelled baskets to keep the look tidy.
Hooks and pegboards are ideal for hanging ironing boards, drying racks and coats. Heavy-duty hooks will support wet coats or wellington boots without bending. Peg systems let you rearrange tools as your needs change.
Baskets and bins make sorting simple. Woven or plastic baskets suit linens and pet supplies. Transparent containers speed up small tasks by showing detergent pods and clothespins at a glance.
Smart storage for cleaning supplies and ironing gear
Store cleaning products safely in lockable cupboards or on high shelves away from children and pets. Use drip trays and sealed containers to prevent leaks and keep shelves clean.
Ironing storage solutions can save floor space. Wall-mounted or fold-down boards tuck away when not in use. Choose integrated irons with hanging loops and include a nearby heat-proof rest surface for safety.
Organise cleaning kits with dedicated pull-out trays for bottles and in-door racks for sprays. Vertical broom holders or clip systems from brands such as Rubbermaid or Brabantia stop tools from falling over.
Innovations to consider include sliding laundry baskets under counters, built-in recycling bins with multiple compartments and ceiling-mounted pulley airers for drying. These additions increase function while keeping the room uncluttered.
Appliances, plumbing and ventilation considerations
Planning your utility area around reliable appliances and sound services keeps chores quick and prevents costly repairs. Think about the type of machines you want, where water and waste will run, and how you will move moist air out of the room. Small choices now save time and energy later.
Choosing the right washing machine and dryer setup
Pick appliance types that fit your routine. Front-loading washers tend to be gentler on clothing and use less water. For drying, heat-pump dryers give the best long‑term savings, although they cost more up front. Condenser dryers work well when external venting is impractical. Vented tumble dryers need an external outlet but can be cheaper to buy.
Decide between stacking and side‑by‑side layouts. Stacking with a manufacturer-approved kit saves floor space, but the washer must sit level to avoid vibration. Side‑by‑side allows a continuous worktop above for sorting and folding. Integrated washer‑dryers suit very tight spaces, but expect longer cycle times and lower drying efficiency.
Match drum capacity to household needs; a 7–9kg drum fits most families. Check current UK energy labels and aim for top ratings to cut running costs. Look for features such as delayed start, quick cycles and anti‑crease or steam options to make daily laundry easier.
Plumbing placement and drainage best practice
Keep the washing machine close to cold and hot supplies where required, with isolation valves that are easy to reach. Fit a proper waste outlet with an anti‑siphon trap and ensure pipework has the correct falls to help drainage and prevent blockages.
In basements or garages, include a trapped gulley or floor drain to handle leaks. Design the floor with a slight fall toward the drain. Where backflow risk exists, install non‑return valves and follow local building regulations to protect mains water.
Use a qualified plumber for new runs or relocations. Professionals pressure‑test joints, check for leaks and leave access points for future maintenance, saving you disruptions and expense later.
Ensuring adequate ventilation and moisture control
Choose the right ventilation strategy for your use. An extractor fan with a humidity sensor clears moisture at source and helps prevent mould. Passive ventilation such as an openable window may suffice for light use but is unreliable in cold weather.
Fit appropriate dryer venting for the appliance. Vented tumble dryers must have ducting to the outside using rigid or semi‑rigid pipework with as few bends as possible to reduce lint buildup. Condenser and heat‑pump dryers collect moisture internally; where possible route condenser drains to a sink or dedicated waste outlet.
Prevent condensation by keeping the room warm and insulated. Use breathable finishes and consider anti‑condensation paint on cold walls. Clean filters and ducts regularly to maintain airflow and reduce the risk of mould and poor performance.
- Choose energy‑efficient utility room appliances to reduce bills.
- Plan washing machine and dryer setup for access, stability and worktop space.
- Locate utility room plumbing with isolation valves and proper falls.
- Design ventilation utility room systems to manage moisture and protect surfaces.
- Ensure correct dryer venting and routine maintenance to avoid lint hazards.
Finishes, flooring and lighting to create a durable and pleasant space
Choose durable worktops utility room you can clean easily. Laminate, Corian solid surface, stainless steel or stone-effect quartz stand up to stains and knocks. Fit an overhang where you fold laundry so you work at a comfortable height and reduce back strain.
For walls and cabinets, pick moisture-resistant paints in matt or satin and tiles or splashbacks in splash-prone zones. Cabinet finishes such as sealed painted timber, PVC-faced boards or laminate resist humidity and are simple to wipe down. Light colours and subtle textures will reflect light and make the room feel larger while robust handles and kickboards protect against daily wear.
Select utility room flooring with waterproof flooring utility room performance in mind. Luxury vinyl, ceramic or porcelain tile and sealed concrete are sensible choices; vinyl is warm underfoot and quick to fit, tiles are very hard-wearing and pair well with underfloor heating. Prioritise slip-resistant surfaces, sealed joints around appliances and smooth thresholds to stop water ingress and to meet building requirements.
Layer your lighting so task and ambient needs are both covered. Bright LED ceiling panels plus under-cabinet task lights give clear illumination for sorting and treating clothing. Use neutral 3000–4000K tones, IP-rated fittings near sinks, and plan sockets and fused connections for appliances. Add small comforts — a standing mat, a stool and organised baskets — and set a simple maintenance routine for filters, seals and plumbing to keep the space working well.